
How to Color Neatly and Stay in the Lines
Quick answer
To color neatly, outline the inside edge of each shape first, then fill the middle so you never cross the lines. Use small, even strokes in one direction, keep your pencil or marker sharp, and rest your hand on a scrap sheet to avoid smudging. Working slowly from one side to the other keeps coverage even and clean.
By the TheColoringPages.net team. Reviewed for accuracy, September 2026.
Want to learn about Color Neatly? This guide gives clear, practical steps, drawing on drawing and years of hands on coloring.
Neat coloring, with clean edges and no color escaping the lines, makes any page look polished and professional. Whether you are an adult wanting crisp results or helping an older child improve, staying in the lines comes down to a simple method and a few good habits, not talent. With the right approach, anyone can color neatly.
This guide covers the techniques for neat coloring, from the border then fill method to controlling your edges and fixing mistakes, so your pages look clean and finished.
Quick answer: Color neatly by outlining just inside the lines first, then filling toward the center. Go slowly at the edges, use a sharp point, and turn the page rather than your hand to reach awkward areas. This border then fill method keeps color crisp and inside the lines. Light pressure and patience at the edges are the keys.

The outline then fill method
The single most effective technique for neat coloring is to outline first, then fill.
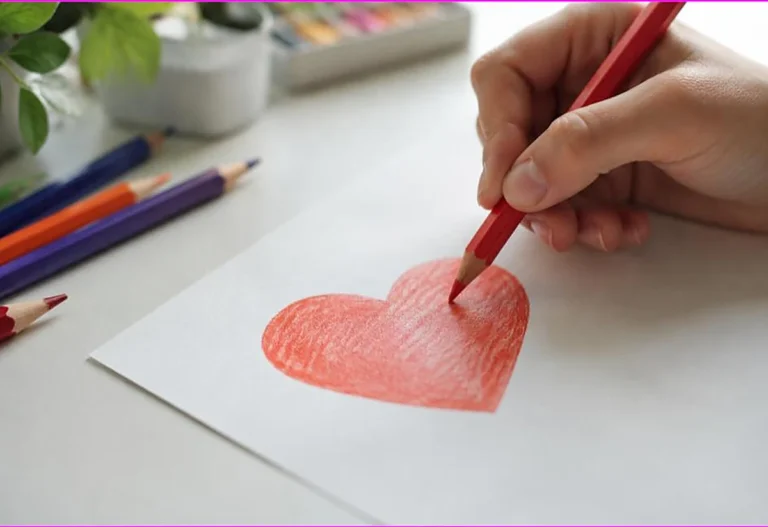
Start by carefully coloring a border just inside the outline of a shape, following the line closely with control. This creates a neat, colored boundary inside the lines. Then fill the rest of the shape by coloring inward from your border toward the center, where you can color faster and more freely without worrying about the edge, since your neat border already protects it.
This method works because it separates the careful part, the edge, from the easy part, the fill. You give your full attention and control to the border, going slowly and precisely, then relax and fill the middle quickly. This is far easier than trying to color the whole shape carefully at once, and it gives much neater results.
The border then fill method is used by skilled colorists for exactly this reason. It makes neat coloring achievable for anyone, since you only need control for the thin border, not the whole area. Practice coloring a neat border first, then filling, and your pages will look noticeably cleaner. Our guide on coloring techniques for beginners covers this as a core skill.
Sharp tools and good grip
The right tools and grip make neat coloring much easier.
A sharp point is essential for neat edges. A blunt colored pencil or a worn marker tip cannot follow a line precisely, so it strays over the edge. Keeping your pencils sharp, and using markers with a fine tip for edges, gives you the precision to color close to the line. Sharpen pencils regularly, especially before working on edges, for the cleanest results. Our guide on the best colored pencils for adult coloring covers keeping a good point.
A good grip gives you control. Holding your pencil or marker in a comfortable, controlled grip, not too tight, lets you guide it precisely along the line. The mature tripod grip, using thumb and first two fingers, gives the most control. Holding the tool a little closer to the tip also increases precision for detailed edge work.
Using a fine tip for edges and a broader tip or the side of a pencil for filling large areas combines precision where you need it with speed where you do not. Matching your tool to the task, sharp and fine for edges, gives neat results efficiently. The right tools, kept sharp, and a controlled grip are the foundation of neat coloring.
Slow at the edges, fast in the middle
A key habit for neat coloring is varying your speed: slow and careful at edges, faster in the middle.
At the edges, slow down. Coloring the border requires precision, so take your time and follow the line carefully. Rushing the edges is the main cause of color escaping the lines. Giving the edges your full attention and a slow, controlled pace keeps them clean. This is where care matters most.
In the middle, once your neat border is in place, you can speed up and fill freely. The border protects the edge, so you do not need to be careful in the center. This lets you color the bulk of the shape quickly and relax, which makes coloring more enjoyable and efficient. The contrast, slow at edges, fast in the middle, is the rhythm of neat coloring.
This approach is both neater and more efficient than trying to color the whole shape at one careful pace. It concentrates your care where it matters and lets you relax where it does not. Building this rhythm, slowing for edges and speeding for fills, makes neat coloring feel natural and keeps it enjoyable rather than tense. Our guide on color large areas evenly covers filling the middle smoothly.

Turning the page
A simple trick for reaching awkward edges neatly is to turn the page, not your hand.
When an edge is at an awkward angle for your hand, rather than twisting your wrist into an uncomfortable position, turn the paper so the edge is at a comfortable angle for a natural stroke. This lets you color every edge with the same controlled, comfortable motion, rather than struggling with awkward angles that lead to mistakes.
Skilled colorists rotate their paper constantly as they work, always positioning the area they are coloring for the most comfortable, controlled stroke. This small habit makes a big difference to neatness, since a comfortable hand position gives better control than a twisted one. There is no need to keep the page fixed in one position.
So as you color, feel free to turn the page whenever an edge would be easier to reach from a different angle. Combined with the border then fill method and a sharp point, turning the page lets you color every edge neatly and comfortably. It is a simple habit that skilled colorists rely on, and it is easy to adopt.
Controlling pressure
Light, controlled pressure helps with both neatness and overall quality.
At the edges, light pressure gives you more control and makes any small stray marks less noticeable and easier to correct. Pressing hard at an edge makes mistakes bolder and harder to fix, while light pressure keeps them subtle. Building up color in light layers, rather than pressing hard, also gives smoother, neater fills. Our guide on coloring techniques for beginners covers light layering.
Light pressure also protects your tools and paper. Heavy pressure wears down pencils fast, can tear paper, and gives patchy color. Light, controlled strokes give better results in every way, neatness included. So develop the habit of coloring with a light touch, especially at edges, building up color gradually.
Controlled pressure works alongside the other techniques. A sharp point, a good grip, light pressure, and the border then fill method together give clean, precise edges and smooth fills. None of these require talent, only practice and good habits. Building them makes neat coloring achievable and consistent, whatever your natural ability. The result is pages that look polished and professional.
Fixing mistakes
Even with good technique, small mistakes happen, so knowing how to fix them helps.
For colored pencil mistakes, a soft eraser can lift some stray marks, especially light ones, though it will not remove all pigment. Erasing gently at the edge of a shape can clean up small strays. A kneaded eraser, which lifts pigment gently, works well for this. For heavier marks, erasing is limited, which is another reason to use light pressure at edges.
For marker mistakes, which cannot be erased, prevention is key, since stray marker is hard to fix. If you do stray, you can sometimes disguise a small mistake by incorporating it, or by coloring the surrounding area to balance it. This is why the border then fill method and light, careful edges matter most with markers. Working carefully at edges prevents most marker mistakes.
The best approach is prevention through good technique, since fixing mistakes is limited, especially with markers. But small strays are normal and rarely ruin a page, so do not worry too much about perfection. Coloring is meant to be relaxing, and a few small imperfections are part of handmade work. Focus on good habits, and let go of perfectionism. Our guide on the benefits of coloring for adults covers keeping coloring relaxing.
Helping children color neatly
For older children learning to color neatly, a gentle approach works best.
Coloring inside the lines develops around ages 5 to 6, as fine motor control matures, so do not expect neat coloring from young children, as our guide on what age kids color inside the lines covers. For older children ready to color more neatly, gently teaching the border then fill method, and offering pages with clear, well sized areas, helps them improve.
Keep it encouraging, not critical. Showing a child the technique and praising their improving control builds their confidence and skill, while criticizing their coloring can take the joy out of it. Neatness comes with practice and development, so patience matters. A child who enjoys coloring practices more, which improves their neatness naturally over time.
Sharp pencils, a comfortable grip, and pages suited to their control all help a child color more neatly. But the most important thing is keeping coloring enjoyable, so they keep practicing. Gentle guidance, encouragement, and the right tools help an older child develop neat coloring at their own pace. Our guide on how to teach a child to color covers gentle guidance.

Choosing pages that are easier to color neatly
The page you choose affects how easy neat coloring is, so it helps to pick well while you build the skill.
Pages with clear, well defined outlines and moderately sized areas are easiest to color neatly. Bold, clean lines give you a clear boundary to follow, and areas that are neither tiny nor huge are manageable to fill with control. Very intricate pages with tiny sections demand more precision, while very large areas can be harder to fill evenly, so moderate detail suits neat coloring practice best.
As your neatness improves, you can take on more detailed pages with confidence. Detailed pages reward neat coloring, since the precision shows, so they are satisfying once you have the skill. Building up from clearer, simpler pages to more detailed ones lets your neatness develop at a comfortable pace. Our collection of free printable coloring pages spans clean simple designs and intricate ones.
Good paper helps too. Smooth, quality paper lets your pencil or marker glide precisely along lines, while rough or thin paper can catch and cause strays. Printing your pages on decent paper supports neat coloring, as our guide on the best paper for coloring pages covers. Choosing suitable pages and good paper, alongside the border then fill method, sets you up for clean, neat results.
Frequently asked questions about color neatly
How do I color neatly?
Use the border then fill method: carefully outline just inside the lines first, then fill toward the center. Go slowly at the edges, use a sharp point, turn the page to reach awkward areas, and use light pressure. This keeps color crisp and inside the lines.
What is the border then fill method?
It means coloring a neat border just inside a shape’s outline first, then filling the rest by coloring inward from that border. It separates the careful edge work from the easy fill, making neat coloring much easier and more reliable.
How do I stay in the lines?
Color a careful border inside the lines first, going slowly with a sharp point and light pressure, then fill the middle freely. Turn the page to reach edges comfortably. Concentrating your care on the thin border keeps color inside the lines.
How do I fix coloring mistakes?
For colored pencils, a soft or kneaded eraser can lift some light stray marks. Marker mistakes cannot be erased, so prevention through careful edges matters most. Small strays are normal and rarely ruin a page, so do not worry about perfection.
Why does my coloring go outside the lines?
Usually from rushing the edges, a blunt point, or heavy pressure. Slow down at the edges, keep your point sharp, use light pressure, and color a careful border first. Turning the page for comfortable strokes also helps you stay in the lines.
The takeaway on color neatly
Neat coloring comes from method and good habits, not talent. Use the border then fill approach, coloring a careful edge first, then filling freely. Keep a sharp point, use light pressure, go slowly at edges, and turn the page for comfortable strokes. Fix small mistakes gently, but do not chase perfection, since coloring is meant to be relaxing. With these habits, anyone can color neatly and enjoy clean, polished pages.
Ready to practice neat coloring? Browse our free printable coloring pages with clear, well defined areas. Every one is free to download and print.