How to Blend Markers (Alcohol and Water-Based)
Quick answer
To blend markers, work while the ink is still wet and move from light colors to dark. Lay the lighter shade down first, overlap the darker one into it, and feather the edge where they meet; a colorless blender marker smooths the transition further. Alcohol-based markers blend most seamlessly because the inks melt into each other.
By the TheColoringPages.net team. Reviewed for accuracy, September 2026.
Want to learn about Blend Markers? This guide gives clear, practical steps, drawing on marker pens and years of hands on coloring.
Smooth, blended marker color is what gives coloring that polished, professional look, with colors flowing seamlessly from light to dark. Blending markers is easier than many people think, especially with alcohol markers, which are made to blend. Once you learn a few simple techniques, you can create gradients and shading that make your coloring genuinely impressive.
This guide covers how to blend both alcohol and water based markers, the main blending methods, the paper that makes it work, and the common mistakes to avoid.
Quick answer: Blend alcohol markers by working while the ink is wet: lay the lighter color first, then the darker, and feather where they meet, or use a colorless blender to soften edges. Work light to dark and keep the paper saturated for smooth gradients. Use heavier or marker paper. Water based markers blend less easily but can be softened with a wet brush.

Alcohol versus water-based blending
The type of marker changes how you blend, so start by knowing which you have.
Alcohol markers are made for blending. Their ink stays workable and re activates when you add more, so colors merge smoothly into seamless gradients. This is why artists favor alcohol markers, and why most marker blending techniques are designed for them. If you want smooth, professional blends, alcohol markers make it far easier. Our guide on alcohol versus water based markers compares the two.
Water based markers blend less easily, since their ink dries more quickly and does not re activate the same way. You can achieve some blending with them, especially by working fast while wet or by using water to soften and merge the color, but the results are less smooth than with alcohol markers. Water based markers suit flat color and simple blends more than seamless gradients.
So if blending matters to you, alcohol markers are worth considering. That said, this guide covers methods for both, so you can blend with whatever you have. The techniques differ a little, but the goal is the same: smooth transitions between colors. Let us look at the main methods.
Method 1: light-to-dark feathering
The core alcohol marker blending method is feathering from light to dark, which creates smooth gradients.
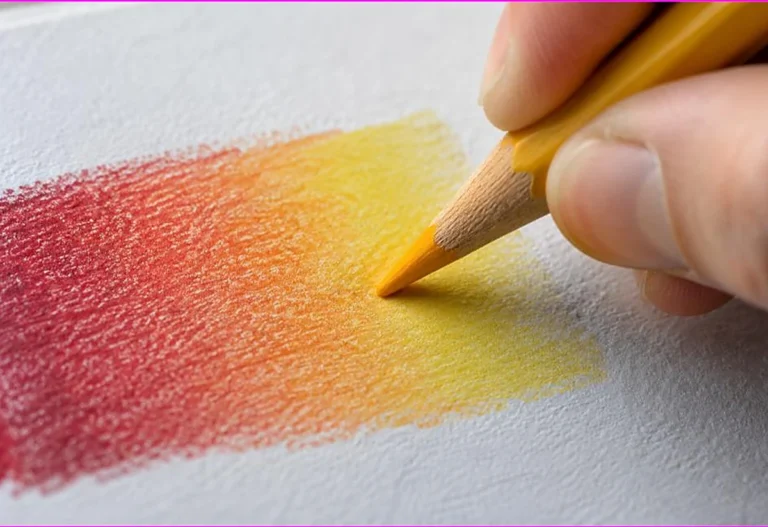
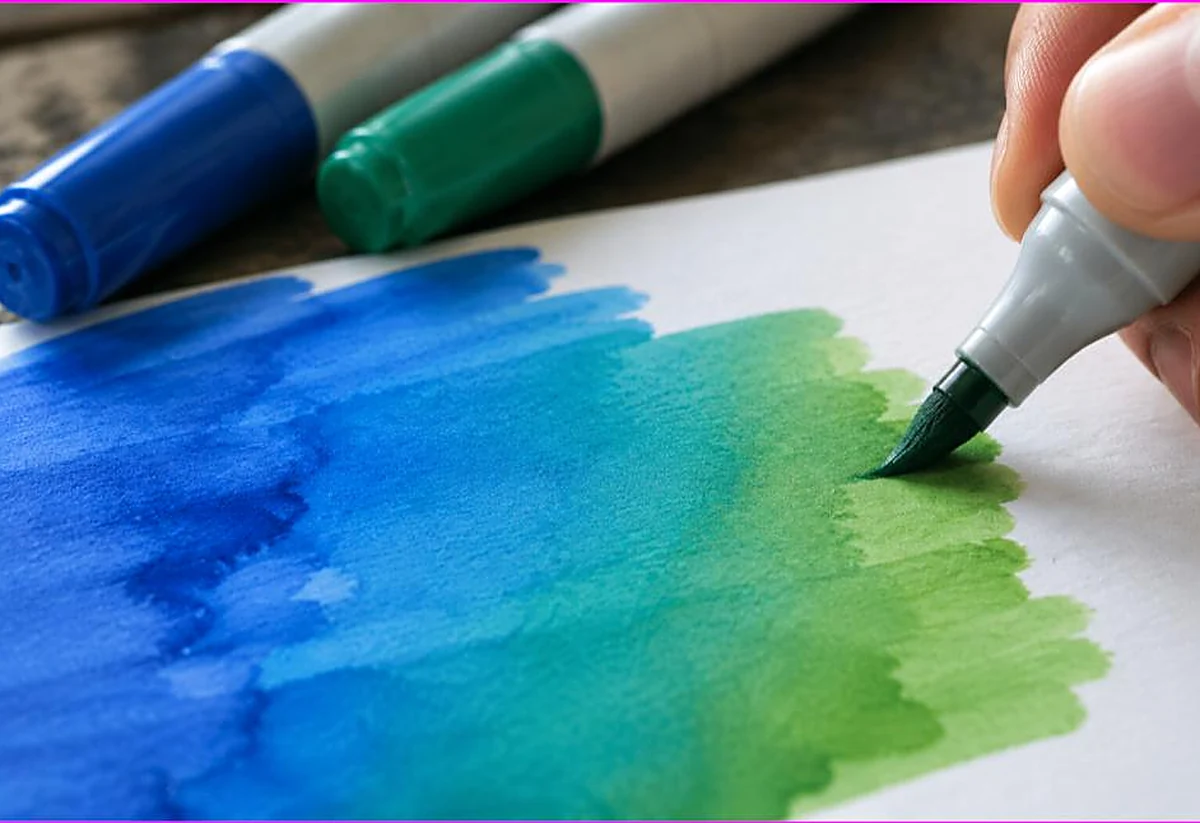
Work from light to dark. Lay down your lightest color first across the whole area. Then add your darker color where you want the shadow or depth, and while both are still wet, feather the darker color into the lighter one with light, flicking strokes. Because alcohol ink stays workable, the darker color merges into the lighter, creating a smooth gradient.
The key is to work quickly while the ink is wet, so the colors can merge. If the first color dries before you add the second, the blend will be harder and less smooth. Keeping the area saturated, and working with light, overlapping strokes in the transition zone, gives the smoothest result. You can go back and forth between the colors to refine the blend.
This light to dark feathering is the foundation of alcohol marker blending. It creates the gradients that make coloring look rich and dimensional, like a sky shifting from pale to deep blue, or an object shading from light to shadow. Practice it on a simple shape to build your feel for the timing and pressure. Our guide on how to shade a coloring page covers using blends for shading.
Method 2: colorless blender
A colorless blender is a valuable tool for softening and smoothing alcohol marker blends.
A colorless blender is an alcohol marker with no pigment, just the clear solvent. It pushes and dissolves the colored ink, softening edges and smoothing transitions. After laying your colors, go over the transition area with the colorless blender to merge the colors more smoothly, or use it to soften a hard edge into a gradient. It can also lighten an area or create highlights.
The colorless blender works best on wet or recently applied ink, where it can move the color. On fully dried ink it has less effect. Using it as part of your blending, after feathering your colors together, gives an extra level of smoothness. Most alcohol marker sets include or offer a colorless blender, and it is a worthwhile part of your kit.
Use the colorless blender with a light touch, since too much solvent can flood the area or damage the paper. Building up gently gives the best control. Combined with light to dark feathering, the colorless blender helps you achieve the smooth, professional gradients that make alcohol marker coloring impressive. It is especially useful for softening transitions you find too abrupt.

Method 3: flicking and gradients
The flicking technique creates soft gradients, which is useful for shading and natural transitions.
Flicking means making quick, light strokes that fade out at the end, rather than solid strokes. To create a gradient with flicking, apply your color with flicking strokes that are dense at one end and fade out toward the other. Layering these flicks builds a gradient that shifts from solid color to light, which is perfect for soft shadows and natural transitions.
You can combine flicking with a second color, flicking the darker color into the lighter so they merge in a soft gradient. This works well for shading, since it lets you build up depth gradually and control exactly where the color fades. It is a versatile technique for creating soft, natural looking transitions rather than hard edges.
Flicking takes a little practice to control the strokes, but it gives you fine control over gradients and shading. It works alongside feathering and the colorless blender as part of your blending toolkit. Practicing flicks on scrap paper builds your confidence before applying them to a page. Our guide on coloring techniques for beginners covers building up technique.
Paper that helps blending
The right paper makes a big difference to how well markers blend, so it is worth getting right.
Marker paper or heavy, smooth paper gives the best blends. Marker paper is made to hold alcohol ink on the surface long enough to blend, and its smooth surface lets colors merge evenly. Heavy cardstock also works well. These papers keep the ink workable and prevent it soaking away before you can blend, which is essential for smooth gradients. Our guide on the best paper for coloring pages covers weights and types.
Thin paper works against blending. It soaks up ink quickly, so colors dry before you can merge them, and it lets ink bleed through, marking the surface below. If you must use thin paper, work fast and place a backing sheet underneath, as our guide on how to color with markers without bleeding through covers. But for good blends, heavier or marker paper is far better.
So before you blend, choose the right paper. Printing your coloring pages on heavier paper or marker paper sets you up for smooth, successful blending, while thin paper makes it frustrating. This is one of the simplest things you can do to improve your marker blending. Good paper and good technique together give the best results.
Common blending mistakes
A few common mistakes trip up marker blending, and avoiding them helps a lot.
Letting the ink dry before blending is the biggest. Alcohol markers blend best while wet, so if you color the first area, then take too long to add the second, the blend will be hard and streaky. Work quickly, keep the area saturated, and blend while the ink is still wet. This is the key to smooth transitions.
Using the wrong paper is another. Thin paper soaks up ink too fast to blend and causes bleed through. Heavier or marker paper holds the ink workable for blending. Using thin paper is a common reason blends fail, so switch to better paper for blending. Streaking often comes from thin paper or from letting the ink dry, both fixable.
Pressing too hard or overworking an area can also cause problems, flooding the paper or damaging it. Use light, controlled strokes and build up gradually. And trying to blend very different colors can look muddy, so blend colors that are close in tone or that transition naturally. Avoiding these mistakes, and practicing on good paper while the ink is wet, gives smooth, successful blends.
Practicing marker blending
Regular practice builds smooth blending quickly, so a simple drill helps.
Practice a two color gradient on a strip of marker paper. Lay the lighter color across the whole strip, then add the darker color at one end and feather it into the lighter while both are wet. Aim for a smooth transition with no hard line. Repeat until you can create a clean gradient consistently. This builds the core feathering skill.
Then practice using a colorless blender to soften a transition, and try flicking to create a soft gradient. Practicing each technique on scrap or simple shapes lets you focus on the method. Try different color pairs, since some blend more smoothly than others, which builds your sense of which colors work together.
Keep practice relaxed and treat imperfect blends as learning. Marker blending, especially with alcohol markers, becomes much easier with a little practice, and the smooth, professional results are genuinely rewarding. Once you are confident, apply your blending to coloring pages, adding gradients and shading that lift your work. Our collection of free printable coloring pages gives you designs to practice on.

Blending water-based markers
While alcohol markers blend most easily, you can still achieve blends with water based markers using a few approaches.
Working fast while wet is the first approach. Water based ink dries quickly, so lay your colors and merge them immediately, before the first color dries. Overlapping the colors while both are wet lets them blend to a degree, though not as smoothly as alcohol markers. Speed is key with water based markers.
Using water to blend is the second approach, and it takes advantage of the water based ink. After laying your colors, go over the transition with a slightly wet brush or a water brush, which dissolves and merges the ink into a softer, more blended, watercolor like finish. This works because the ink is water soluble. Use heavier paper that can handle the moisture without buckling, and do not overwet it.
A colorless water based blender marker can also help, softening and merging water based ink much as a colorless alcohol blender does for alcohol ink. Water based marker blends suit a softer, watercolor style rather than the seamless gradients of alcohol markers. So if you have water based markers, lean into their watercolor quality with the wet brush method for the best results. Our guide on alcohol versus water based markers covers the differences.
Frequently asked questions about blend markers
How do you blend markers?
Blend alcohol markers by laying the lighter color first, then feathering the darker color into it while both are wet, or by using a colorless blender to soften edges. Work light to dark on heavy or marker paper for smooth gradients.
Do alcohol markers blend better than water-based?
Yes. Alcohol markers are made for blending, since their ink stays workable and re activates, merging colors into smooth gradients. Water based markers blend less easily but can be softened with water. Alcohol markers give the smoothest blends.
What is a colorless blender marker?
A colorless blender is an alcohol marker with no pigment, just clear solvent. It softens edges, smooths transitions, and can lighten areas or create highlights by moving the colored ink. It is a valuable tool for smooth marker blending.
What paper is best for blending markers?
Marker paper or heavy, smooth cardstock is best, since it holds the ink workable for blending and prevents bleed through. Thin paper soaks up ink too fast to blend and causes bleeding, so it works against smooth blends.
Why won’t my markers blend smoothly?
Common reasons are letting the ink dry before blending, using thin paper that soaks up ink too fast, or blending very different colors. Work quickly while wet, use heavier or marker paper, and blend colors close in tone for smooth results.
The takeaway on blend markers
Blending markers gives coloring a rich, professional look, and it is easier than it seems, especially with alcohol markers. Lay light to dark, feather colors together while wet, and use a colorless blender to smooth transitions. Use heavier or marker paper, work quickly while the ink is wet, and avoid the common mistakes. With a little practice on a simple gradient, you can create the smooth blends and shading that make marker coloring truly impressive.
Ready to practice blending? Browse our free printable coloring pages and print on heavier paper for smooth marker blends. Every one is free to download and print.